
As I’ve stated earlier, I designed my 3D Printer with light milling operations in mind. One of the activities I intended to tackle was the subtle art of PCB milling. It seems pretty straightforward at first: get a new/raw PCB (printed circuit board), use something like FlatCAM to generate G-Code from your Gerber files, get yourself a good milling bit and you’re done. While this is true for coarser trace widths and packages, you’ll soon run into trouble when milling something as fine pitched as an HSSOP-28 (like I’m doing for this little fella). Where 3D printing is fairly robust to submilimeter bed misalignments, milling widths of under 14mils is an unforgiving process: cut depth variations of even 0.01mm can ruin a trace and a board. Naturally, trying to mechanically level the board is the first step. However, larger boards may be somewhat bent, which can be hard to compensate (or flatten).
I’m currently using Marlin as my printer’s firmware. After watching the advances on automated bed leveling (or tramming, as some call it), I figured I could profit from such feature to accurately mill PCBs. However, after some tests, I noticed that only a 3-point leveling wasn’t enough. While the plane of the PCB is identified, curvatures or slightly bent PCBs can’t be properly compensated. Luckily for me, the masterminds behind Marlin are now implementing a grid-based leveling, that does just what I needed. It took me a couple hours and some minor tweaks to the Marlin firmware to get it running. First, checkout the result:
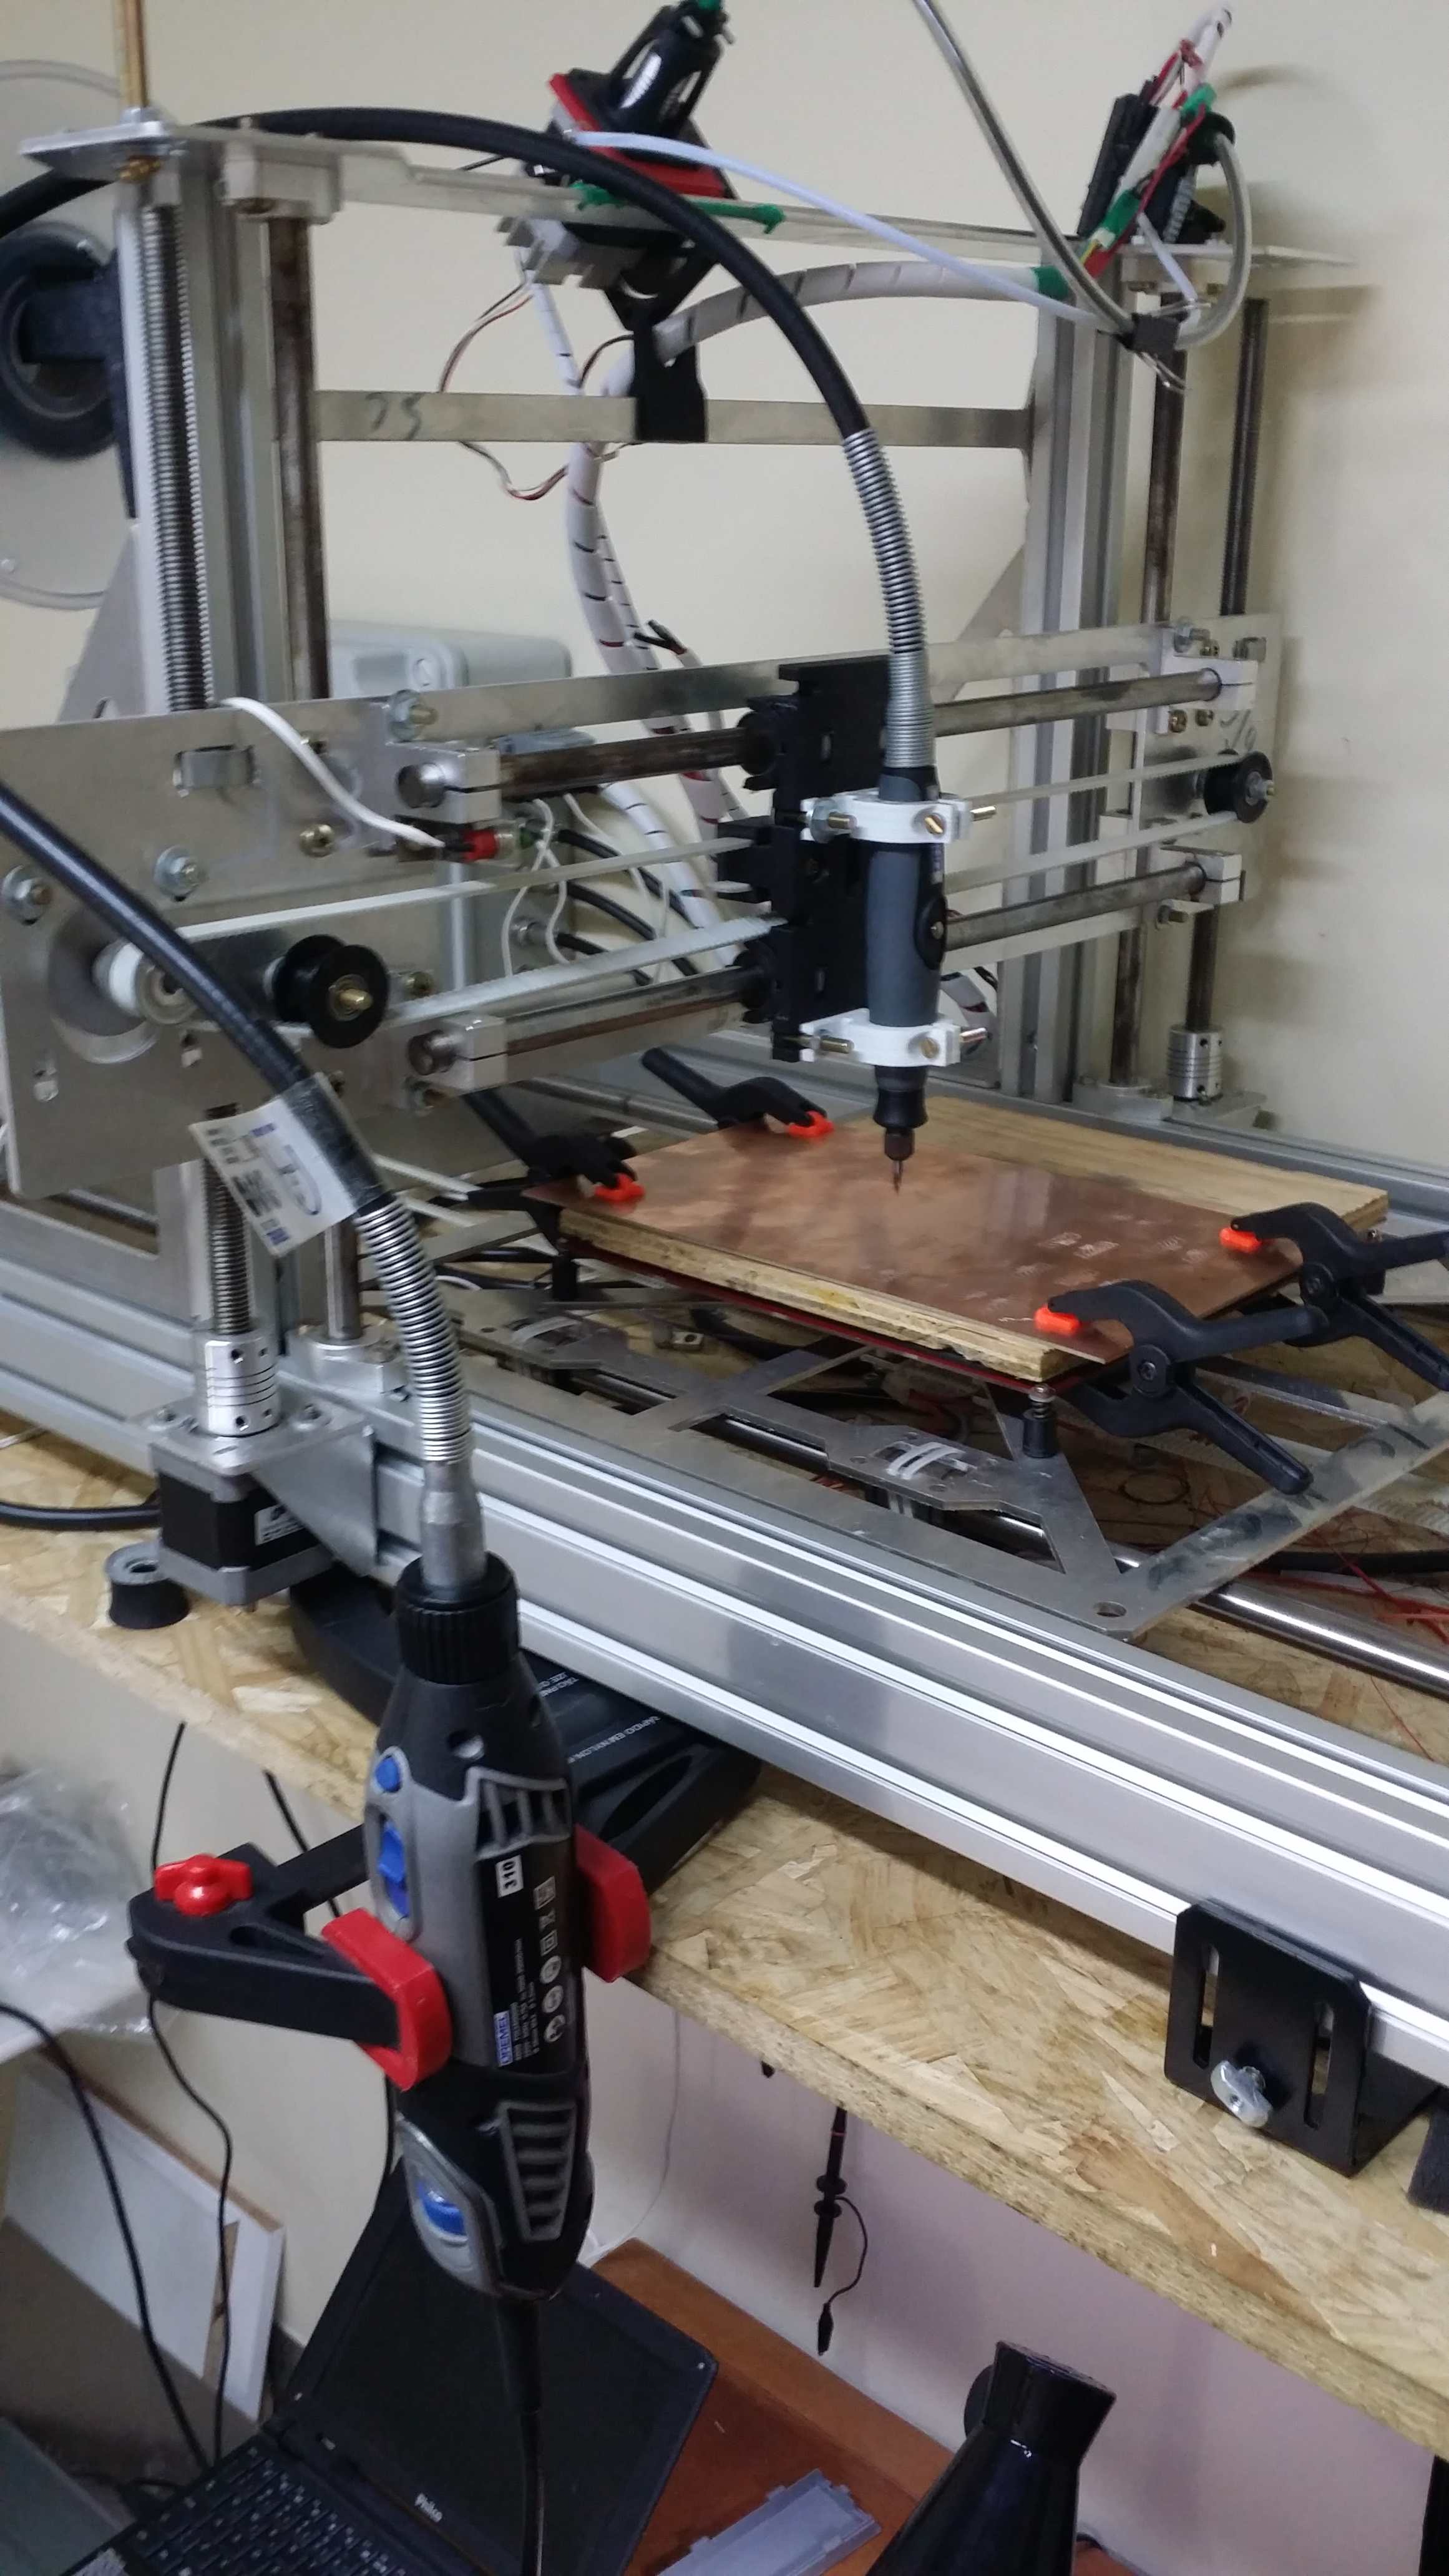
To get all running, I started by printing some mounting clamps for my Dremel’s flex shaft. Carrying the Dremel itself was an option, but the flex shaft is much lighter and equally stiff.
Next step was to convert my Z endstop into a “dual crocodile clip” configuration, as in the picture:
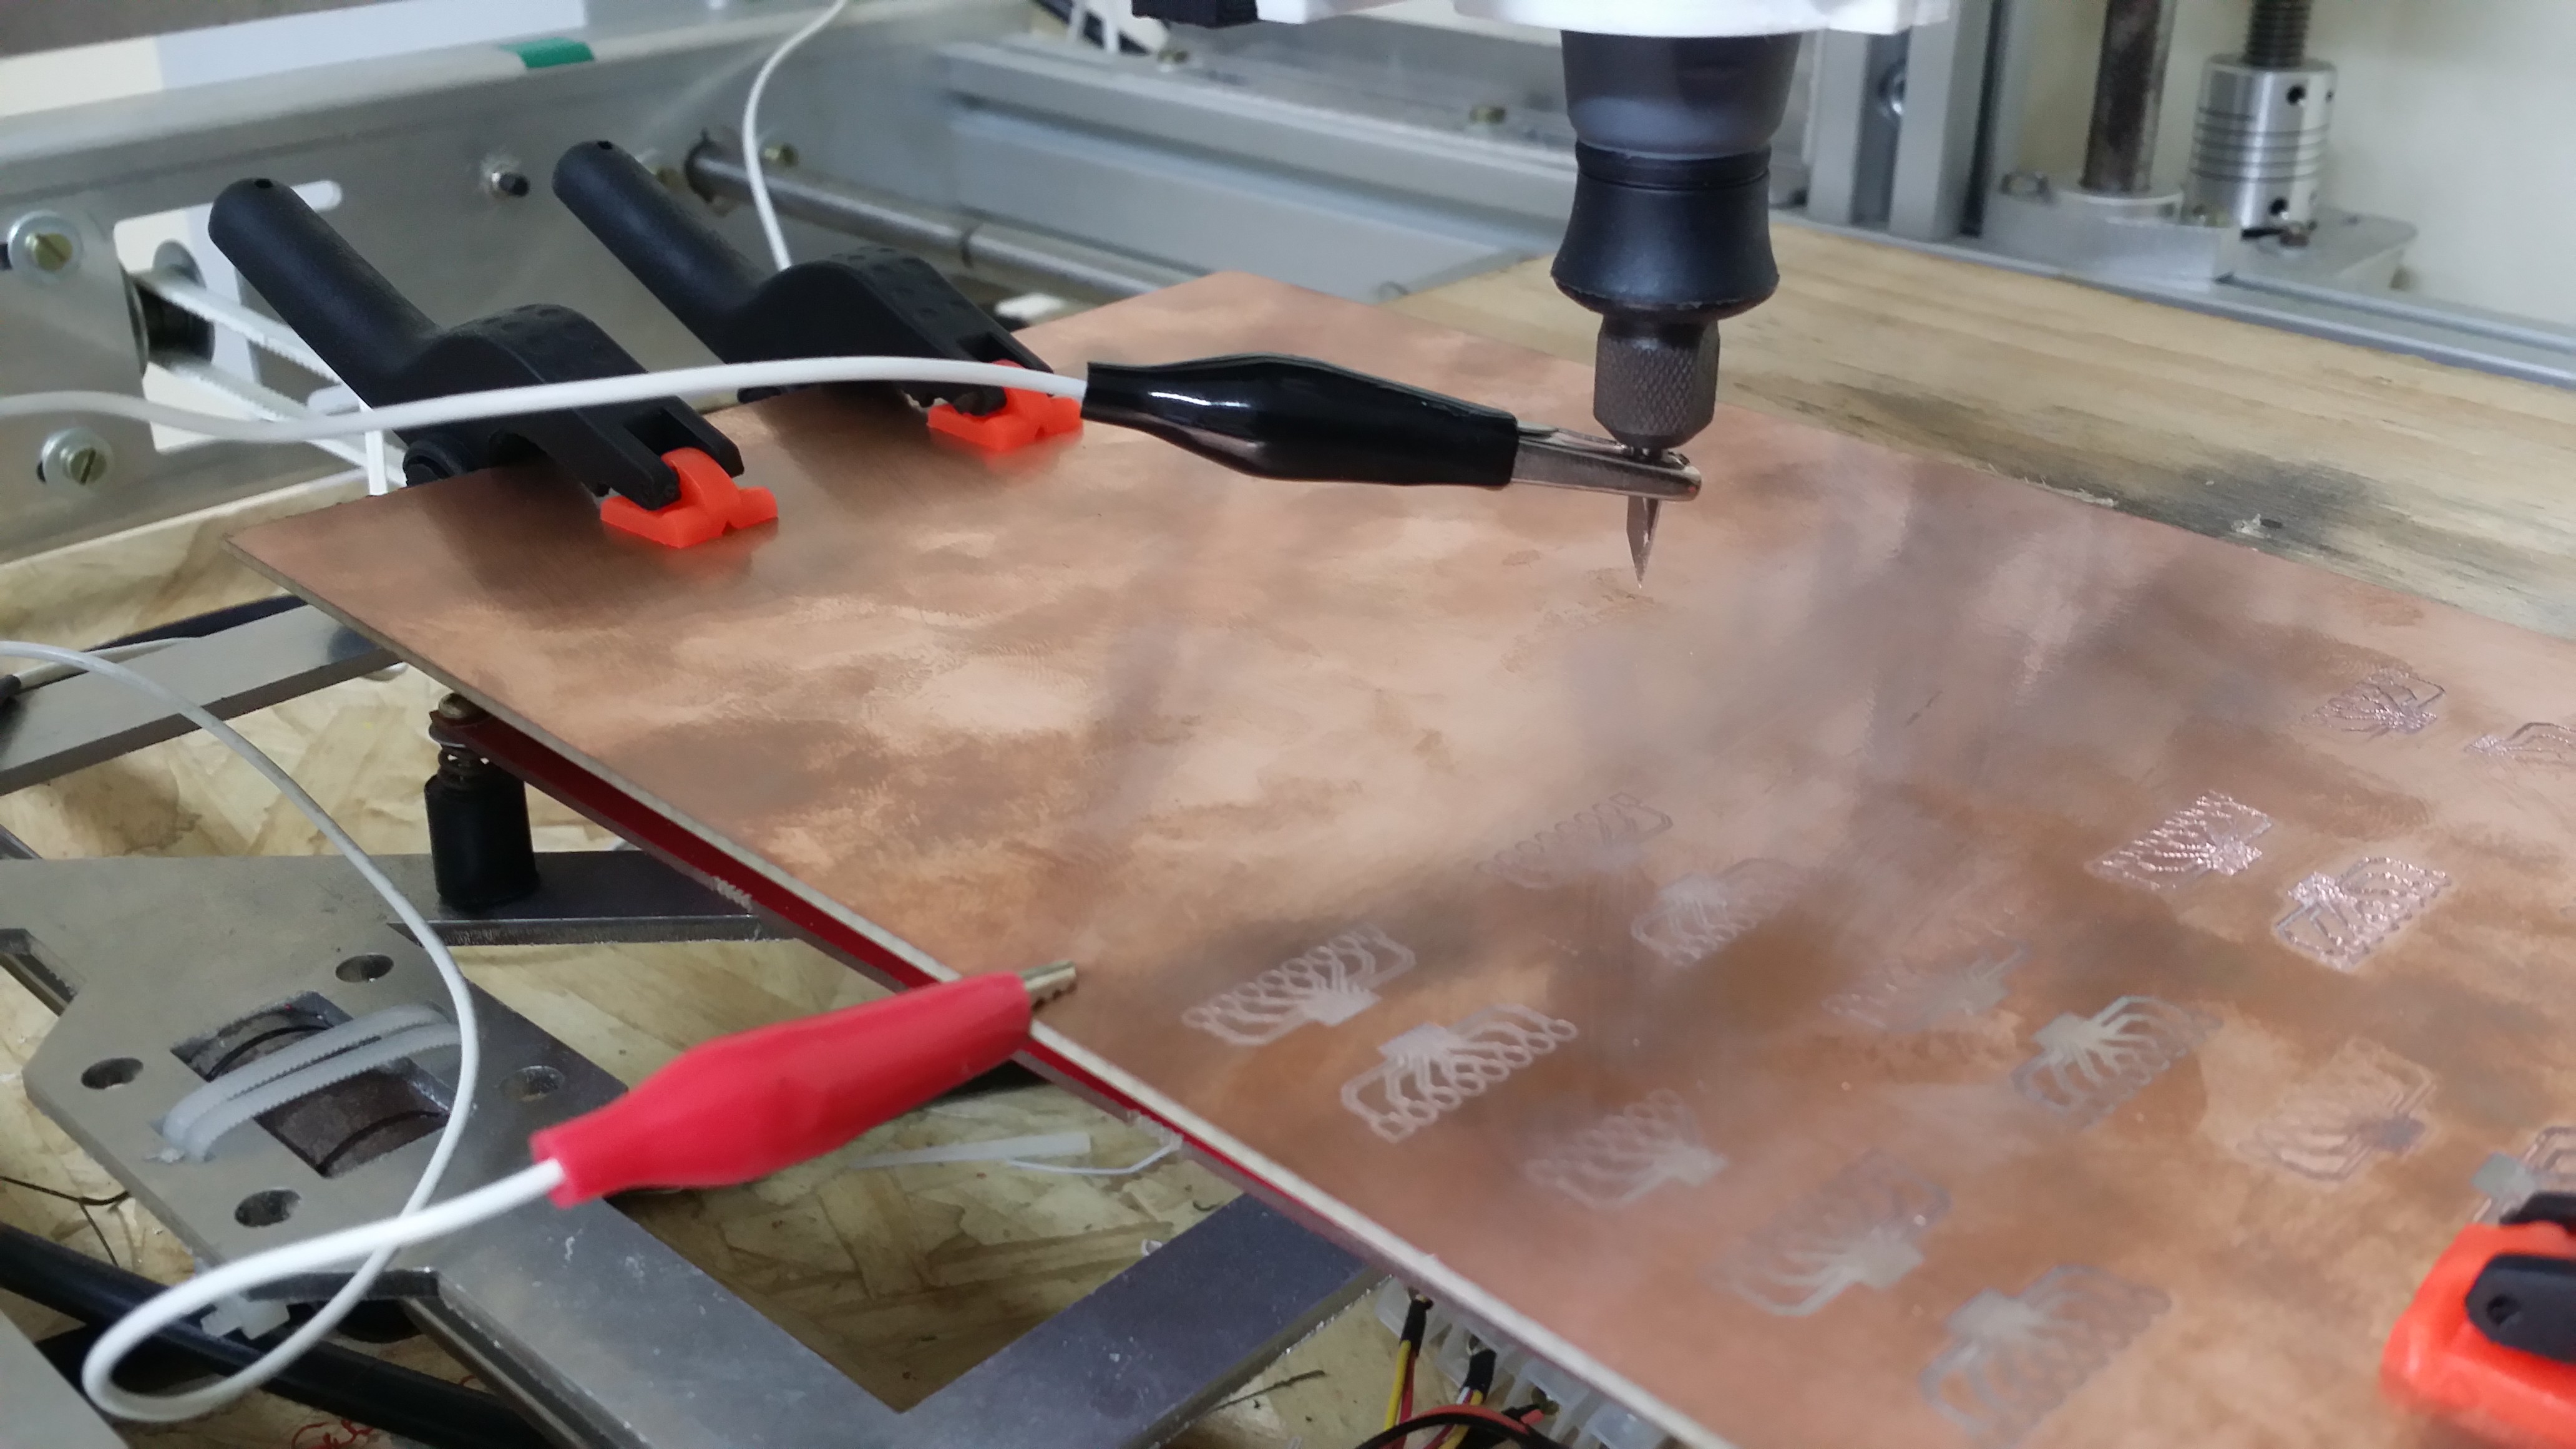
This allows for an accurate on-the-spot Z endstop. After that, on the software side. First, in Marlin’s Configuration.h, I enabled and configured the leveling. Around line 407:
|
1 2 3 4 5 6 7 8 9 10 11 12 13 14 15 16 17 18 19 20 21 22 23 24 25 26 |
//=========================================================================== //============================= Bed Auto Leveling =========================== //=========================================================================== #define ENABLE_AUTO_BED_LEVELING // Enable auto leveling, //#define Z_PROBE_REPEATABILITY_TEST // but this test is not mandatory #ifdef ENABLE_AUTO_BED_LEVELING // ... #define AUTO_BED_LEVELING_GRID #ifdef AUTO_BED_LEVELING_GRID #define LEFT_PROBE_BED_POSITION 0 // Start leveling at the origin #define RIGHT_PROBE_BED_POSITION 30 // Width of the board in mm #define FRONT_PROBE_BED_POSITION 0 // Start leveling at the origin #define BACK_PROBE_BED_POSITION 30 // Height of the board in mm #define MIN_PROBE_EDGE 3 // Probing points must be at least 3mm apart // Set the number of grid points per dimension // You probably don't need more than 3 (squared=9) #define AUTO_BED_LEVELING_GRID_POINTS 4 // 16 points for a small board #else // !AUTO_BED_LEVELING_GRID |
Another important thing to change: since the “extruder” (the milling tool) and the probe are the same, I also changed, in Configuration.h, line 457:
|
1 2 3 4 5 |
// Offsets to the probe relative to the extruder tip (Hotend - Probe) // X and Y offsets must be integers #define X_PROBE_OFFSET_FROM_EXTRUDER 0 // Probe and "hotend" are on the exact same spot! #define Y_PROBE_OFFSET_FROM_EXTRUDER 0 #define Z_PROBE_OFFSET_FROM_EXTRUDER 0 |
Last change. Since you want to mill a PCB, you usually will be cutting in the negative Z space. This means the tooltip has to be able to go to, for example, Z=-1. This won’t happen by default, because the printer “thinks” there is no space below Z=0 (and usually, there isn’t). So, in Configuration.h, give the printer some room in the -Z direction. Be careful! This modification can lead to several headaches once you forget it is in place.
|
1 2 3 4 5 6 7 |
// Travel limits after homing (units are in mm) #define X_MIN_POS 0 #define Y_MIN_POS 0 #define Z_MIN_POS -10 // Allow for negative Z movements #define X_MAX_POS 200 #define Y_MAX_POS 200 #define Z_MAX_POS 200 |
This should suffice. Essentially, we’re tricking Marling into probing only “inside” the size of the board. The downside (for now) is having to change and recompile this for different board sizes. By default, however, Marlin needs to home the X and Y axis before allowing a G29 (auto-leveling) to be performed. Even though this makes sense in the grand-scheme of things, it was a nuisance in my case. I wanted to be able to place the probe in any arbitrary point on the bed/PCB and start the leveling. For that, all I had to do was remove the “homing verification” on Marlin_main.cpp:
|
1 2 3 4 5 6 7 8 9 10 11 12 |
inline void gcode_G29() { // Don't allow auto-leveling without homing first // ... Just comment that verification out. GANGSTA. /* if (!axis_known_position[X_AXIS] || !axis_known_position[Y_AXIS]) { LCD_MESSAGEPGM(MSG_POSITION_UNKNOWN); SERIAL_ECHO_START; SERIAL_ECHOLNPGM(MSG_POSITION_UNKNOWN); return; } */ |
Done! Now I can manually carry the mill/tool/extruder/probe to the desired origin (where I want the board to be milled). There, I just need to issue the following commands:
|
1 2 3 4 |
G28 Z ; Home the Z axis (until it touches the PCB) G92 Z0 ; Tell Marlin that we are at Z=0. ; This is necessary, since it now thinks it's at Z=-10 G29 ; Start the automatic leveling |
After the process ends, your preferred GUI/interface will spit out the surface’s correction matrix calculated by Marlin:
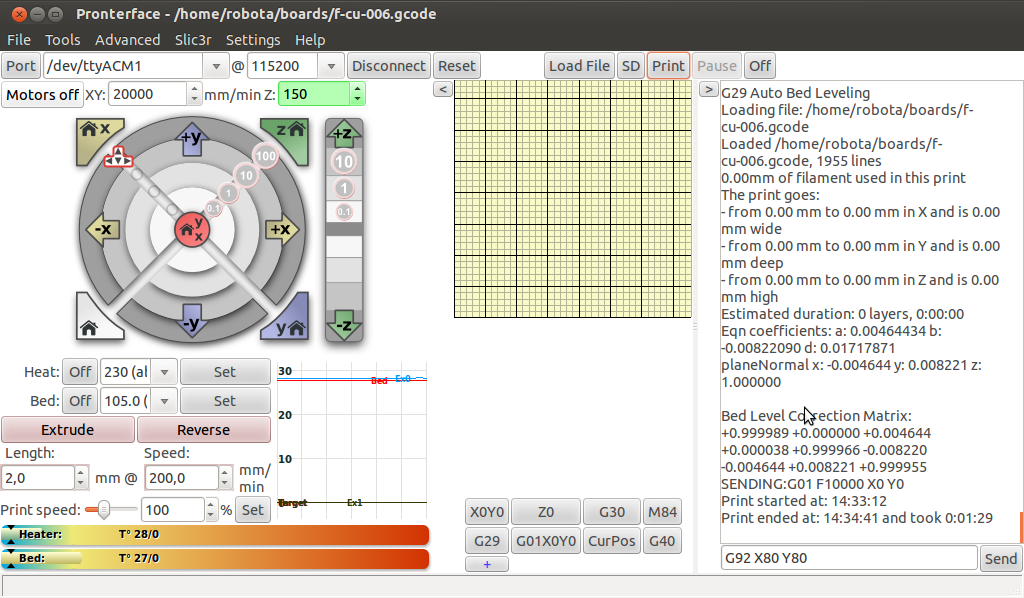
That’s it. Now just print normally – the compensations for the bed’s irregularities will happen automatically on the background. The calibration data is lost at each reboot (though an EEPROM save can be enabled).
’til next time.